概述
本文介绍使用Android Studio创建第一个简单的项目HelloWorld。
步骤
Hello World
新建一个Empty项目:

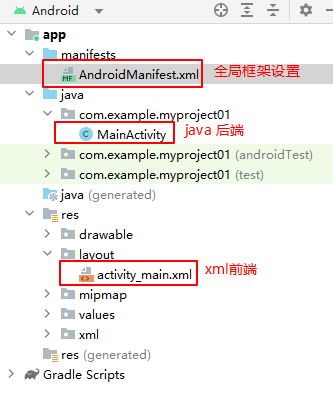
可以看到,新建的项目中包含最基本的前后端元素:
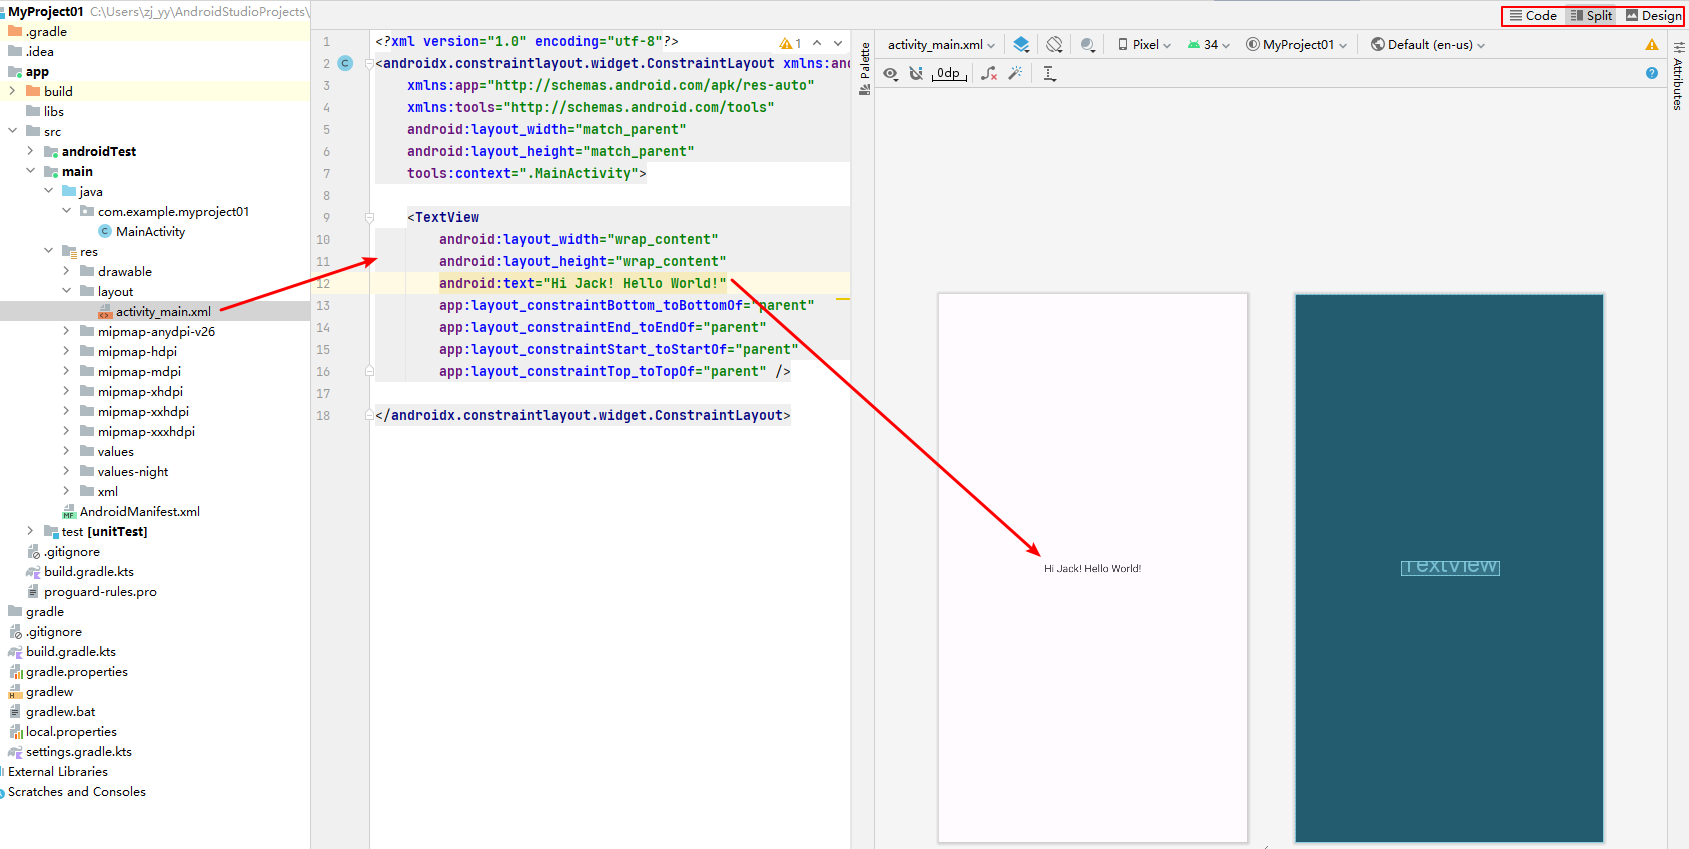
前端activity_main.xml有预览页面(右上角split按钮),可以修改其中的元素:
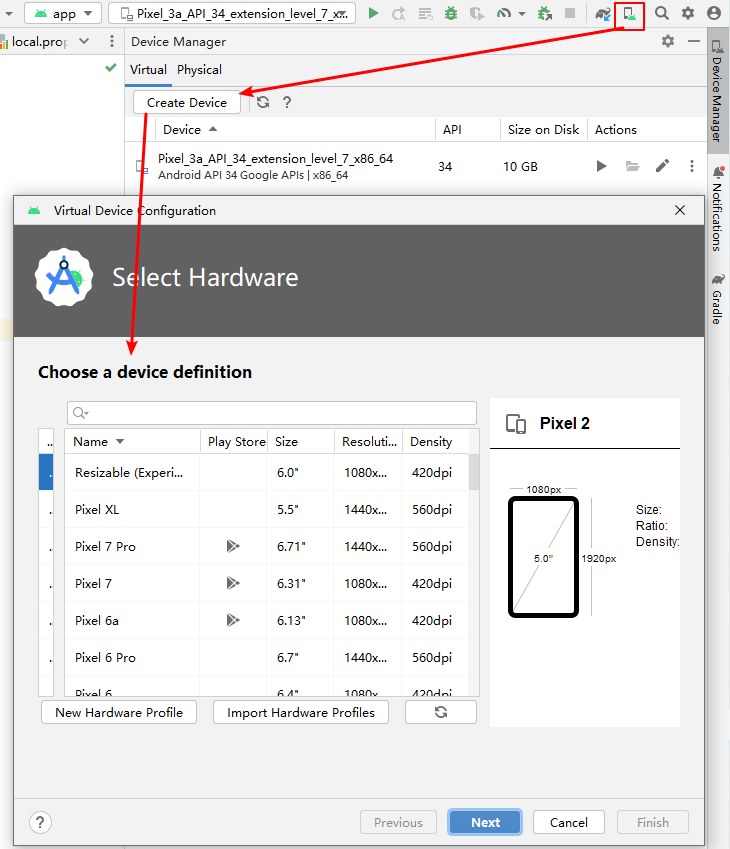
右上角还有个手机图标按钮,可以用来创建安卓模拟器:
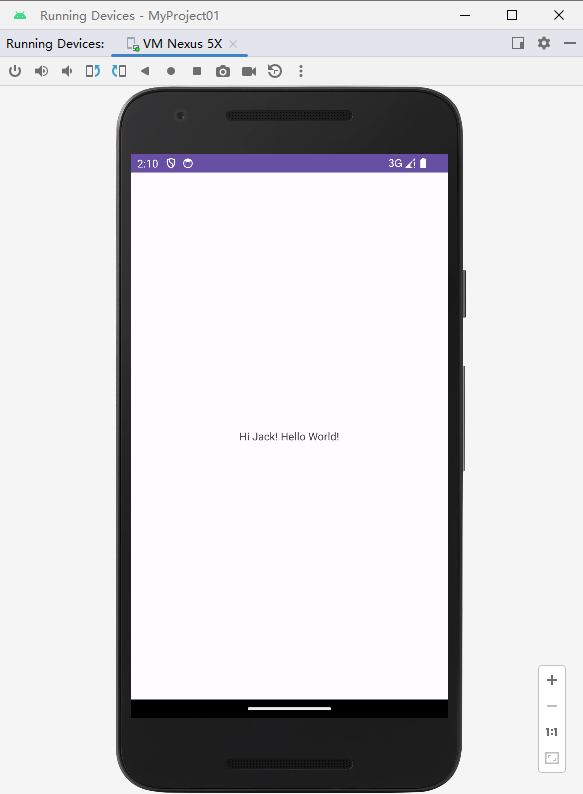
启动安卓模拟器,再点击项目的”run”按钮,即可在模拟器中安装该app并显示主页:
前端:线性布局
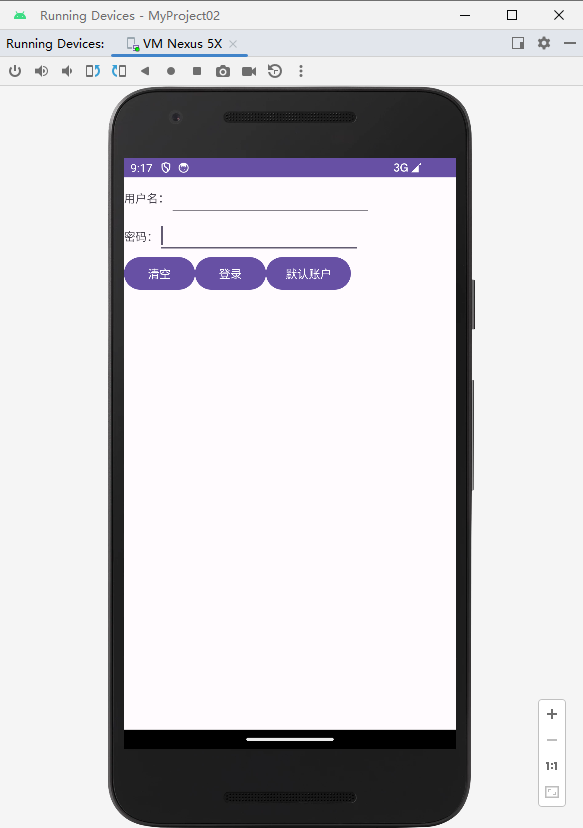
下面介绍一个最简单的前端线性布局的例子:登录页面
activity_main.xml
1
2
3
4
5
6
7
8
9
10
11
12
13
14
15
16
17
18
19
20
21
22
23
24
25
26
27
28
29
30
31
32
33
34
35
36
37
38
39
40
41
42
43
44
45
46
47
48
49
50
51
52
53
54
55
56
| <?xml version="1.0" encoding="utf-8"?>
<LinearLayout xmlns:android="http://schemas.android.com/apk/res/android"
xmlns:app="http://schemas.android.com/apk/res-auto"
xmlns:tools="http://schemas.android.com/tools"
android:layout_width="match_parent"
android:layout_height="match_parent"
tools:context=".MainActivity"
android:orientation="vertical">
<LinearLayout
android:layout_width="wrap_content"
android:layout_height="50dp">
<TextView
android:layout_width="wrap_content"
android:layout_height="50dp"
android:text="用户名:"></TextView>
<EditText
android:id="@+id/et_user"
android:layout_width="250dp"
android:layout_height="match_parent"></EditText>
</LinearLayout>
<LinearLayout
android:layout_width="wrap_content"
android:layout_height="wrap_content">
<TextView
android:layout_width="wrap_content"
android:layout_height="wrap_content"
android:text="密码:"></TextView>
<EditText
android:id="@+id/et_password"
android:inputType="textPassword"
android:layout_width="250dp"
android:layout_height="wrap_content"></EditText>
</LinearLayout>
<LinearLayout
android:layout_width="wrap_content"
android:layout_height="wrap_content">
<Button
android:id="@+id/btn_clear"
android:layout_width="wrap_content"
android:layout_height="wrap_content"
android:text="清空"></Button>
<Button
android:id="@+id/btn_login"
android:layout_width="wrap_content"
android:layout_height="wrap_content"
android:text="登录"></Button>
<Button
android:id="@+id/btn_default"
android:layout_width="wrap_content"
android:layout_height="wrap_content"
android:text="默认账户"></Button>
</LinearLayout>
</LinearLayout>
|
注意其中LinearLayout默认是水平方向依次排列各控件,orientation属性可以改为垂直方向。该例子使用了LinearLayout的嵌套。
点击运行,在安卓模拟器中:
实现点击按钮的功能是最常用的后端逻辑。这里介绍4种给button添加应对点击动作逻辑的方式。
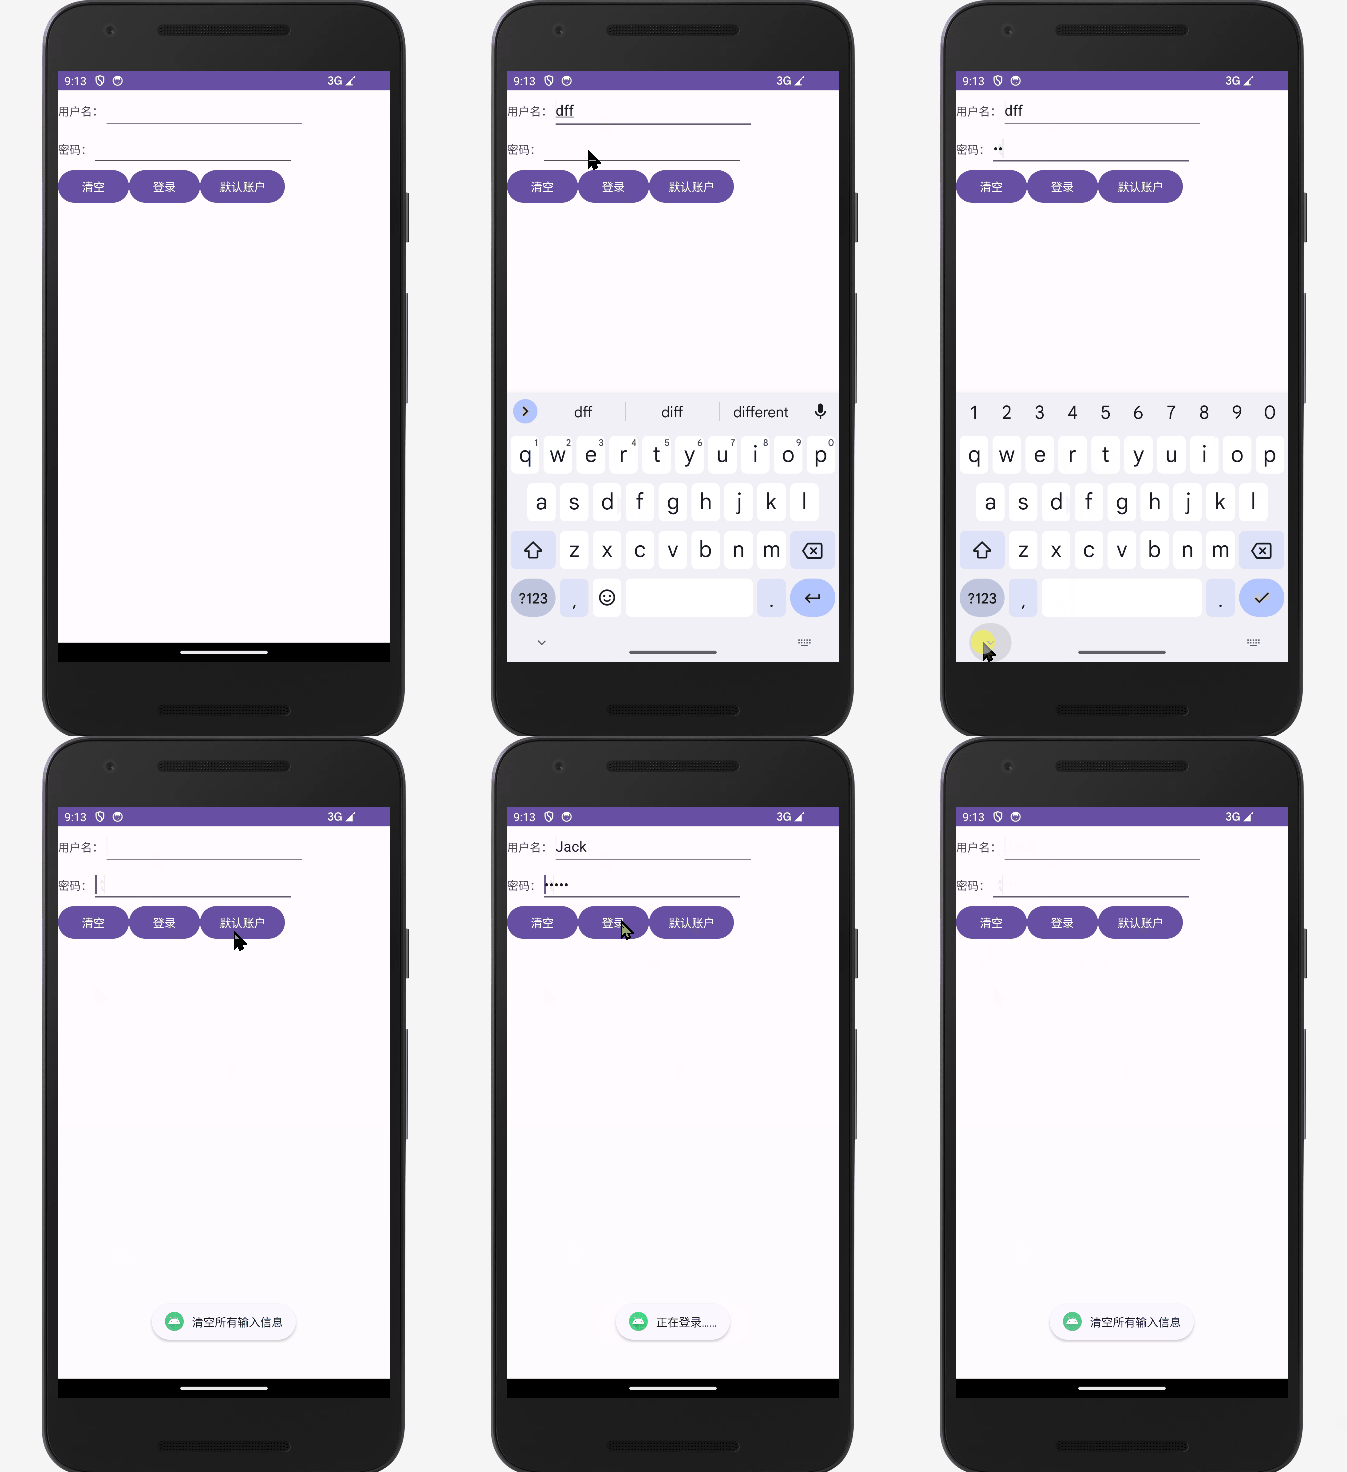
在java后端代码中,定义自己的OnClickListener继承类,改写其中的onClick()方法以定义自己的后端逻辑,并创建该类的对象obj1。同时,创建前端button元素的对象obj2,将obj2绑定在obj1的监听方法(setOnClickListener() )中。为了方便调拭,使用Toast类打印信息到前端窗口。
MainActivity.java
1
2
3
4
5
6
7
8
9
10
11
12
13
14
15
16
17
18
19
20
21
22
23
24
25
26
27
28
29
30
31
32
33
34
35
36
37
38
39
40
41
42
43
44
45
46
47
48
49
50
51
52
53
54
55
56
57
58
59
60
61
| package com.example.myproject02;
import androidx.appcompat.app.AppCompatActivity;
import android.os.Bundle;
import android.view.View;
import android.widget.Button;
import android.widget.EditText;
import android.widget.Toast;
public class MainActivity extends AppCompatActivity {
private EditText et_username, et_password;
private Button btn_clear, btn_login, btn_default;
@Override
protected void onCreate(Bundle savedInstanceState) {
super.onCreate(savedInstanceState);
setContentView(R.layout.activity_main);
et_username = findViewById(R.id.et_user);
et_password = findViewById(R.id.et_password);
btn_clear = findViewById(R.id.btn_clear);
btn_login = findViewById(R.id.btn_login);
btn_default = findViewById(R.id.btn_default);
btn_clear.setOnClickListener(new ClickClear());
btn_login.setOnClickListener(new ClickLogIn());
btn_default.setOnClickListener(new ClickDefault());
}
class ClickClear implements View.OnClickListener{
@Override
public void onClick(View v) {
Toast.makeText(MainActivity.this, "清空所有输入信息", Toast.LENGTH_SHORT).show();
et_username.setText("");
et_password.setText("");
}
}
class ClickLogIn implements View.OnClickListener{
@Override
public void onClick(View v) {
Toast.makeText(MainActivity.this, "正在登录……", Toast.LENGTH_SHORT).show();
}
}
class ClickDefault implements View.OnClickListener{
@Override
public void onClick(View v) {
Toast.makeText(MainActivity.this, "加载默认账户", Toast.LENGTH_SHORT).show();
et_username.setText("Jack");
et_password.setText("12345");
}
}
}
|
点击run,效果如下图:
生成apk安装包
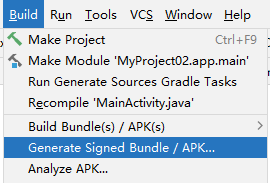
在Android Studio结合模拟器调拭确定程序没有问题后,就可以生成apk安装包,发送到手机上安装即可运行app。方法:Build->Generate Signed Bundle / APK
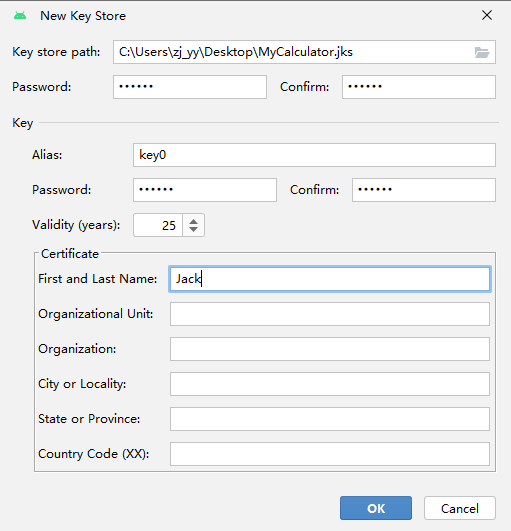
选择APK,接着Create new Key Store,需要至少填写以下信息:
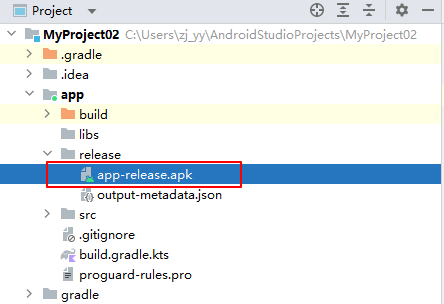
完成之后Next,生成release版本即可。导出的apk在app/release/下可找到:
参考


